

The Building Behind Innova Dental
Innova Dental opens in March 2027 at 16 Wellesley Street West — inside Thomas Bryce Row, an 1876 Second Empire terrace that survived while glass towers replaced the Victorian streetscape around it.
Innova Dental opens in March 2027 at 16 Wellesley Street West in downtown Toronto — inside a building that has stood on that street since 1876.

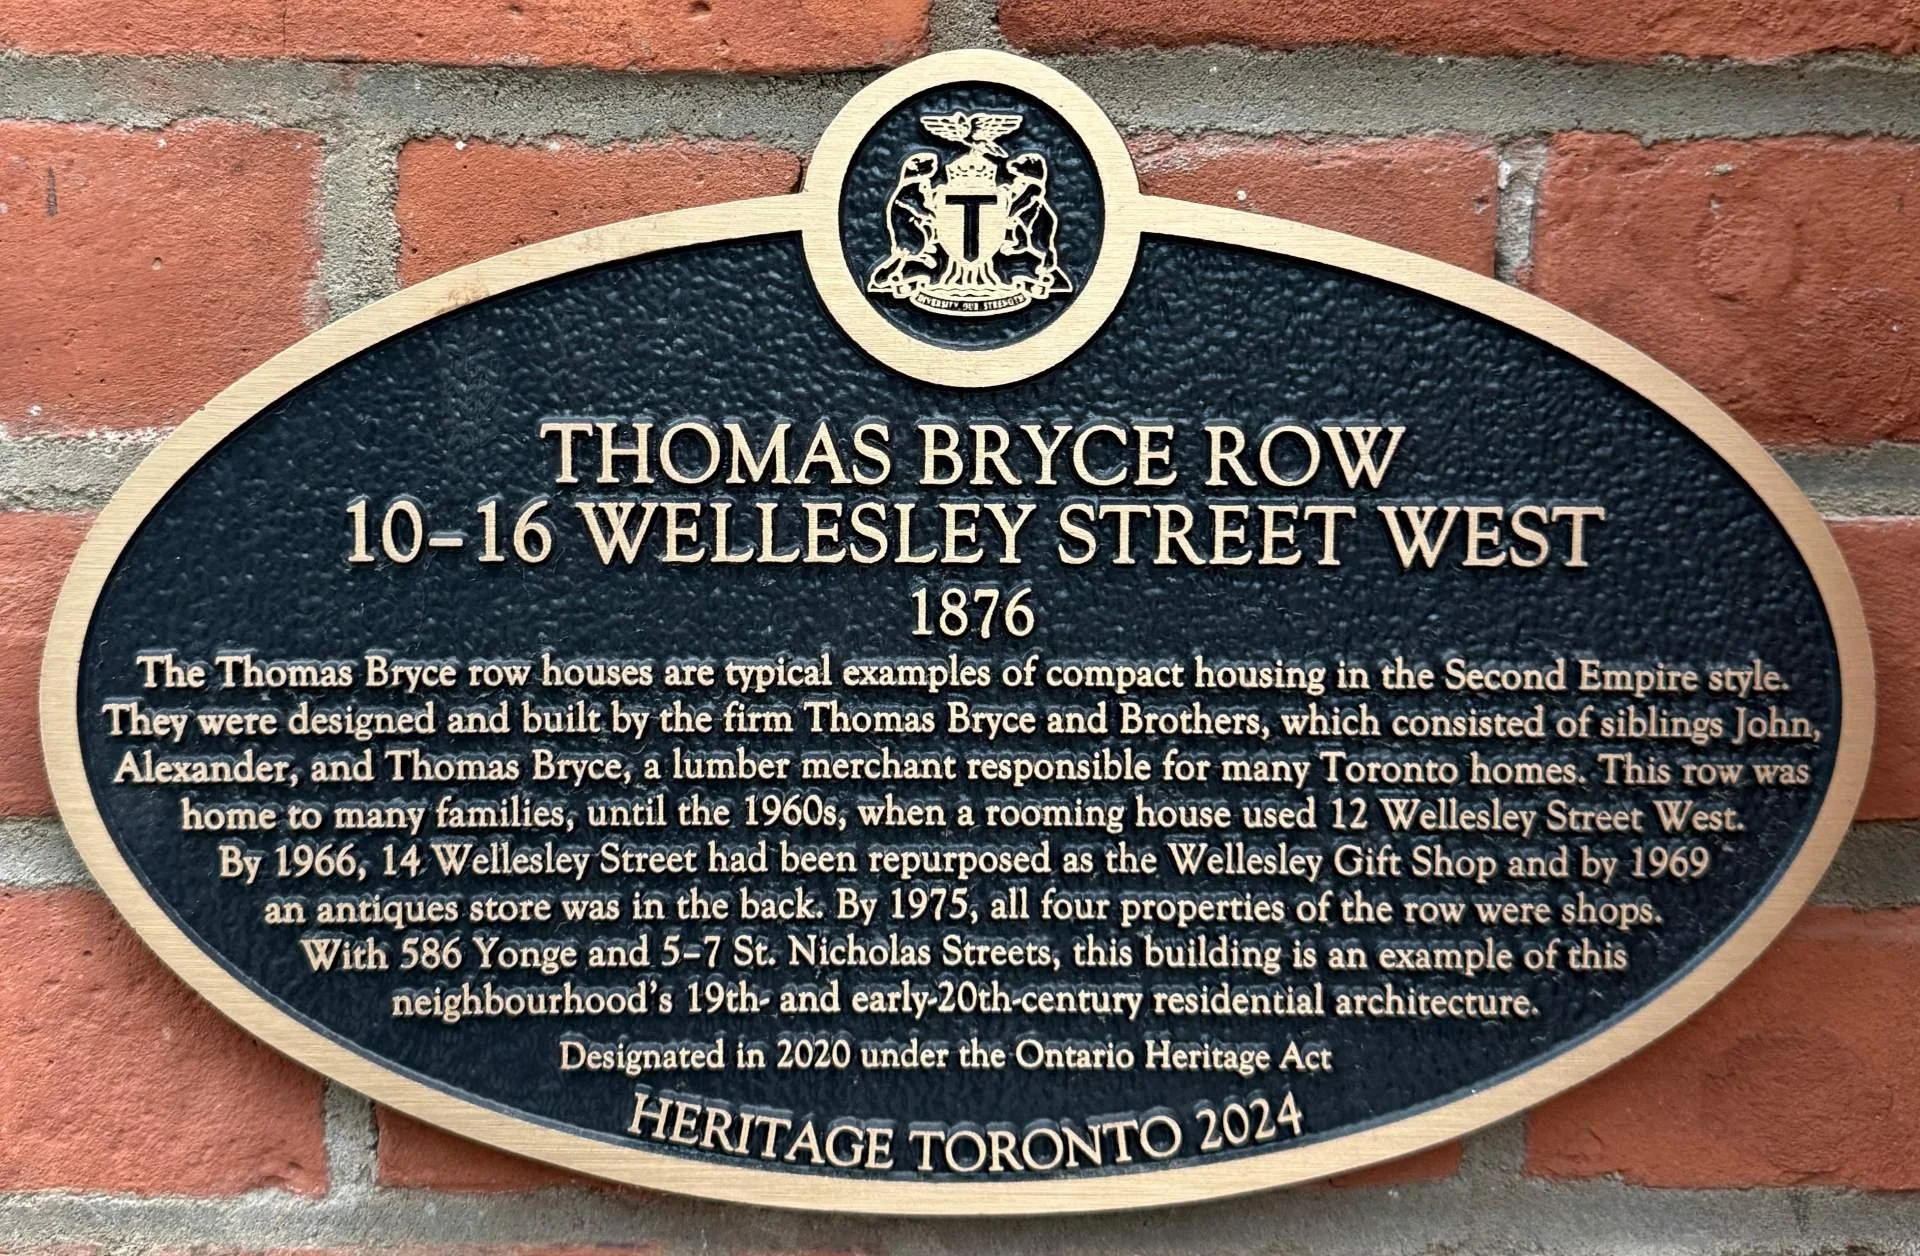
Thomas Bryce Row, 10–16 Wellesley Street West, downtown Toronto — the heritage-designated Second Empire facade that will house Innova Dental. Built 1876, designated under the Ontario Heritage Act in 2020, plaqued by Heritage Toronto in 2024.
Most dental practices occupy generic commercial space. A unit in a medical building, a ground-floor retail conversion, an office suite in a condominium tower. The building is incidental — a container for the work that happens inside.
At 16 Wellesley Street West, the building has a history of its own.
Thomas Bryce Row
The address — 10 to 16 Wellesley Street West — is a terrace of four Second Empire row houses, designed and built in 1876 by the firm Thomas Bryce and Brothers. The firm was run by three siblings: John, Alexander, and Thomas Bryce, a lumber merchant responsible for many Toronto homes of the era. The row — four compact townhouses with mansard roofs, decorative dormer windows, and ornate brick arches — is a characteristic example of the compact, well-crafted residential architecture of the period.
For nearly a century, the row was home to families. By the 1960s the properties had begun moving to commercial use: a rooming house at 12 Wellesley Street West, the Wellesley Gift Shop at number 14 by 1966, an antiques store behind it by 1969. By 1975, all four units were operating as shops. The neighbourhood around them changed dramatically — glass towers replaced the Victorian streetscape in almost every direction. The row survived.
In 2020, the buildings were designated under the Ontario Heritage Act. In 2024, Heritage Toronto recognised the designation with a formal plaque, now fixed to the exterior brick at the entrance.
What Was Preserved
The new construction at 16 Wellesley Street West preserved the exterior facade in its entirety. The Second Empire roofline, the arched windows, the decorative brickwork, the proportions of the original Victorian terrace — all of it remains. What sits behind the facade is entirely new: a modern building shell with the structural, mechanical, and electrical infrastructure a contemporary surgical dental practice requires.
The result is a building that belongs to two periods at once. From the street, it reads as it has since 1876 — a low-rise Victorian row on a block otherwise given over to glass and concrete. From the inside, it is new construction, built to current standards.
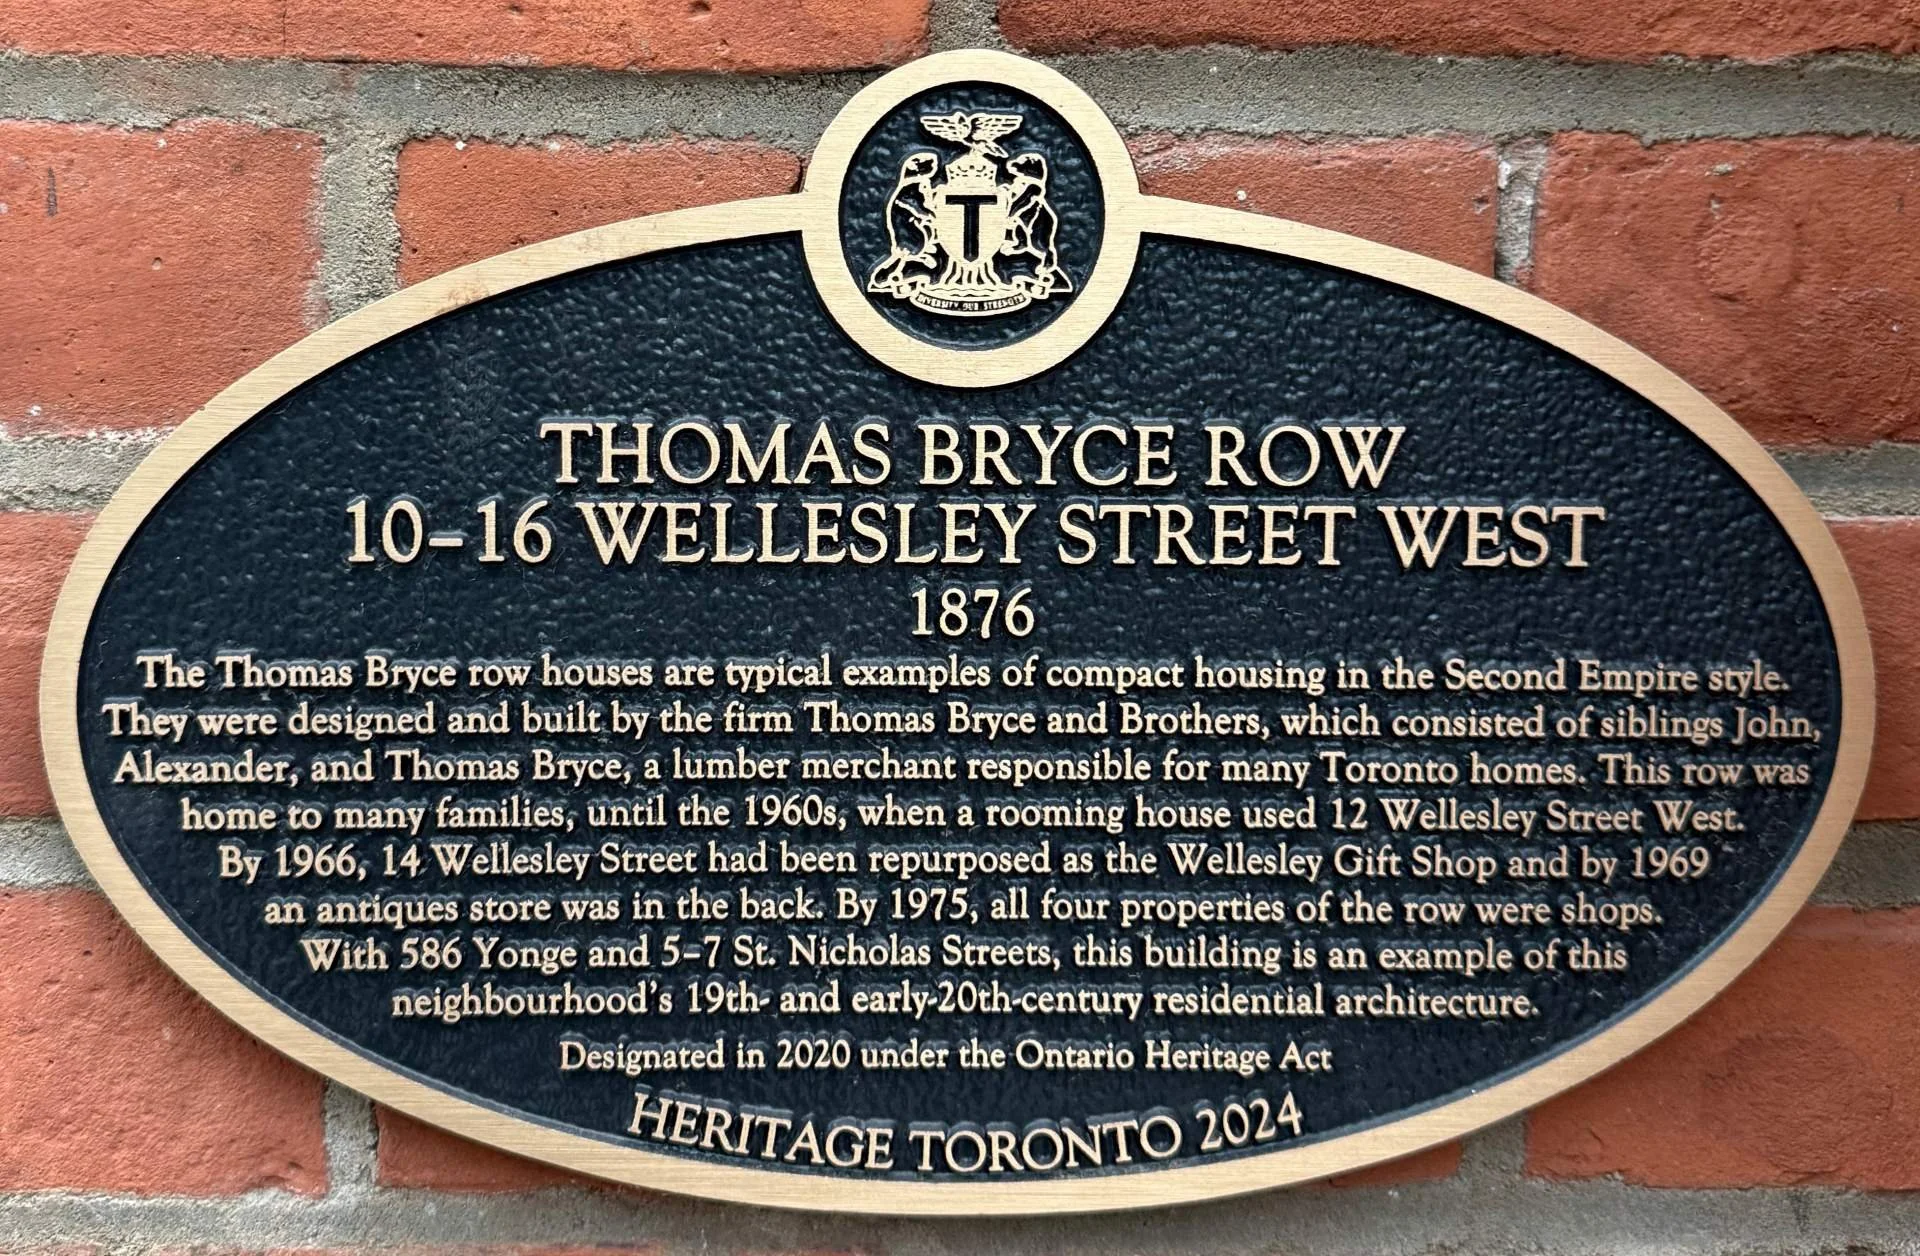
The Heritage Toronto plaque at 10–16 Wellesley Street West, recording the 2020 designation under the Ontario Heritage Act.
Why the Name
Innova Dental was named deliberately. The practice is built around clinical innovation — digital impressions, cone beam CT imaging, full-arch implant rehabilitation, IV sedation — and around bringing that capability into a general dentistry setting, so that more care can be provided in one place where that is clinically appropriate.
The building reinforces rather than contradicts this. Innovation does not require erasing what came before. A dental practice can be technically advanced, genuinely patient-centred, and rooted in its neighbourhood — and it can be all three inside a building with 150 years of history behind its facade.
That is what Innova Dental is being built to be.
The Practice
Innova Dental is led by Dr. Onur Cavus. The clinic opens in March 2027 at 16 Wellesley Street West, at Yonge and Wellesley in downtown Toronto — steps from Wellesley Station on Line 1 — and is currently accepting expressions of interest from future patients.
If you would like to register your interest, visit our contact page.
Innova Dental — 16 Wellesley Street West, Toronto, Ontario. Opening March 2027.
Oral Hygiene and Maintenance for All-on-4 and Full Arch Implants
Maintaining full-arch implant restorations — whether All-on-4, All-on-6, or a removable implant-supported overdenture — requires a different approach to oral hygiene than natural teeth. This guide covers the tools and daily techniques that protect implants long-term, explains what peri-implantitis is and why it matters, and outlines the professional maintenance schedule recommended after full-arch treatment.
Receiving a full arch implants at Innova Dental restoration is a significant step toward restoring function and confidence. However, the journey doesn't end at placement. Unlike natural teeth, full-arch implant restorations require a different approach to oral hygiene and maintenance. Understanding how to care for your All-on-4, All-on-6, or All-on-X restoration is essential to its longevity and your long-term oral health.
Understanding Full-Arch Implant Hygiene
How do you clean All-on-4 implants? The fundamental difference lies in the anatomy beneath the restoration. Natural teeth are anchored by a periodontal ligament—a tissue that acts as a buffer against bacterial damage. Implants, by contrast, integrate directly with bone. This means the tissues around implants lack this protective mechanism and are more vulnerable to bacterial colonisation.
The fixed bridge that sits atop your implants creates an undersurface that is difficult to access with standard floss. Water flossers and interdental brushes become essential tools rather than optional extras. The goal is the same as with natural teeth—prevent plaque buildup—but the methods must account for the unique anatomy of the restoration and the implant-supporting tissues.
What Is Peri-Implantitis and Why Does It Matter?
Peri-implantitis is a bacterial infection and inflammatory condition that affects the tissues and bone surrounding an implant. Unlike natural teeth, where gum disease is often reversible in its early stages, bone loss around an implant can be progressive and difficult to treat if left unaddressed.
Poor oral hygiene is the primary preventable risk factor for peri-implantitis. When plaque accumulates around implants—particularly in the pockets between the bridge and the gum line, and along the undersurface of the restoration—bacteria proliferate. Over time, this leads to inflammation, bone loss, and in severe cases, implant failure. This is why daily maintenance is not optional; it is a cornerstone of implant success.
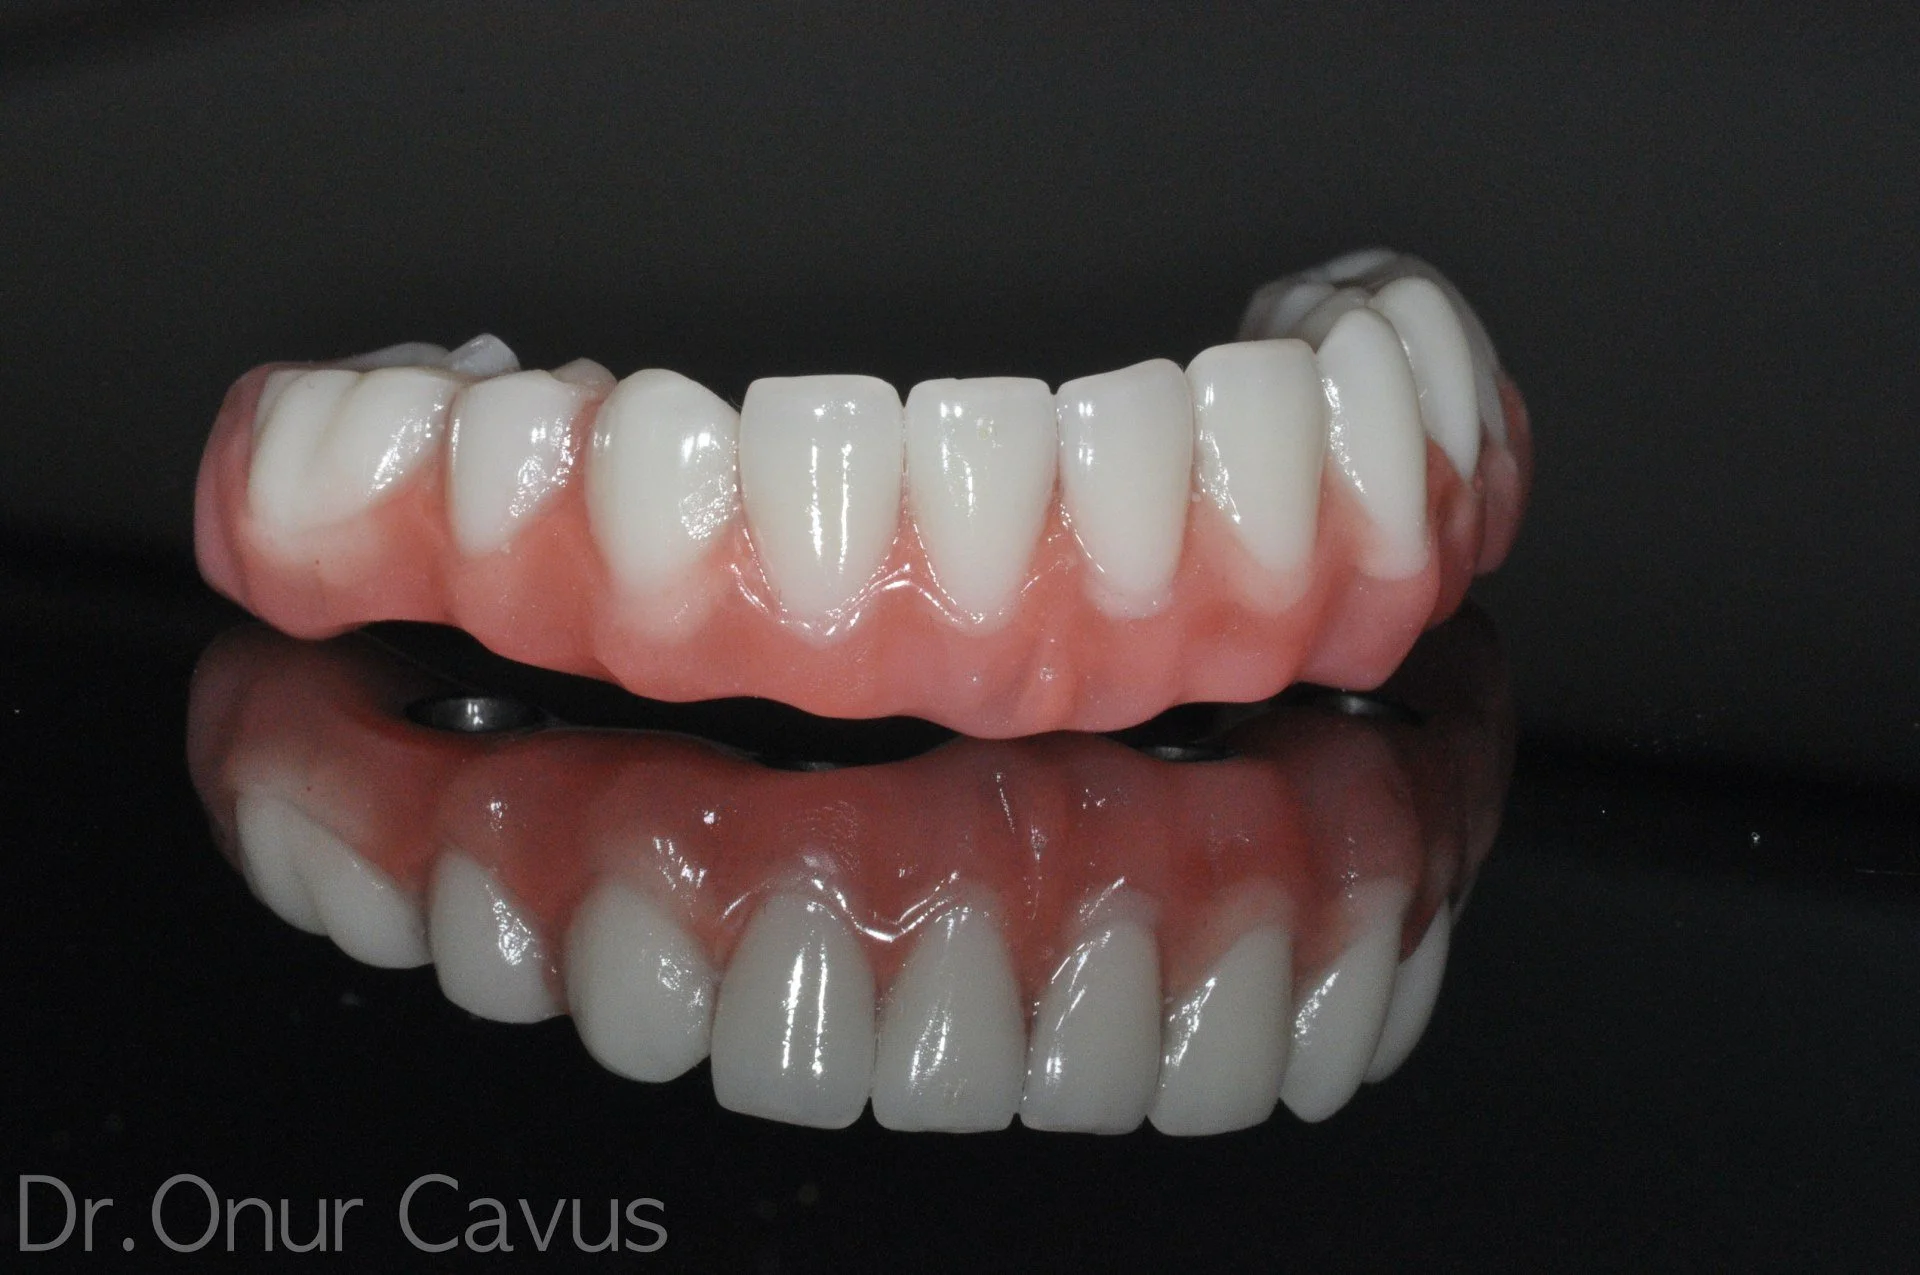
An All-on-4 full arch lower jaw denture with cleansable margins
Daily Hygiene for Fixed Full-Arch Bridges
Water Flossers and Oral Irrigators
Water flossers are highly effective for patients with full-arch restorations. They deliver a pressurised stream of water that removes debris and plaque from beneath the bridge, around each implant site, and along the gum margin.
To use a water flosser effectively: position the tip at a 45-degree angle to the implant-gum interface, aim for the space between the bridge and the tissue, and use a gentle pulsing motion. Work systematically around all implant sites, including the undersurface of the bridge. Use this at least once daily, ideally in the evening.
Interdental Brushes
Interdental (interproximal) brushes are small, bottle-brush-shaped tools that fit between the bridge and the implant abutments. Selecting the correct size is important—the brush should fit snugly without forcing.
Begin with a size that feels comfortable, usually between 0.6 mm and 1.5 mm depending on your restoration. Gently insert the brush under the bridge at each implant site and use short, gentle horizontal or vertical motions. Avoid twisting or forcing the brush, as this can damage the gum tissues. Use interdental brushes once daily.
Soft-Bristle or Electric Toothbrush Technique
Brush the outer surfaces of the bridge and the gum margin with a soft-bristled or electric toothbrush using gentle, circular motions. Pay special attention to the junction between the prosthesis and the gum tissue, where plaque readily accumulates. Brush for at least two minutes twice daily.
For the undersurface of the bridge, angle your toothbrush or water flosser tip upward to clean the area that rests closest to the gum tissue. This is often the most challenging area to reach but is also where peri-implantitis typically begins.
Floss Threaders and Super-Floss
In some cases, traditional floss or super-floss (thicker, stranded floss material) threaded through a needle-like loop can access proximal areas between the bridge and bone. This technique requires practice and patience but may be helpful for additional plaque removal in specific areas. Ask your dental team to demonstrate the technique at your maintenance appointment.
Daily Hygiene for Removable Implant-Supported Overdentures
If your restoration is removable, maintenance is somewhat more straightforward. Remove your denture each evening and rinse it thoroughly under running water to remove loose food debris and plaque.
Soak the denture in a cleaning solution (denture cleaner tablets or gentle liquid soap in warm water) for at least 15 minutes. This softens and loosens biofilm. Using a soft denture brush, gently brush both the outer surface and the inner (fitting) surface that contacts your tissues. Avoid high-pressure water jets, which can damage the denture.
After cleaning, rinse the denture thoroughly and examine the inner surface and your gum tissues for signs of irritation or colour changes. Allow your tissues to rest—ideally leaving the denture out for 4–6 hours daily—to promote tissue health.
What to Avoid
Certain products and practices can damage your restoration or affect the surrounding tissues:
Abrasive toothpastes: Use only gentle, low-abrasive formulations. Avoid whitening or highly-gritty pastes that may scratch acrylic or zirconia surfaces.
Stiff or hard-bristled brushes: These can irritate gum margins and may scratch the prosthesis surface.
High-alcohol mouthwashes: Alcohol can dry tissues and may affect acrylic materials over time. Rinse with alcohol-free antiseptic solutions or saline if recommended by your dentist.
Smoking: Smoking impairs healing and significantly increases the risk of peri-implantitis and implant failure.
Professional Maintenance Schedule
Daily home care is the foundation, but professional monitoring and cleaning are equally important. Most patients with full-arch implants benefit from professional check-ups and cleaning every three to four months during the first year, then every six months thereafter.
During these appointments, your dentist examines the implant sites for signs of inflammation, assesses bone levels, checks the fit and stability of the restoration, and performs professional cleaning to remove calculus (hardened plaque) that home care cannot address. In most cases, professional cleaning requires local anaesthetic to ensure comfort and thorough access.
Your dental team may also perform radiographs periodically to monitor bone levels and detect early signs of problems that are not visible clinically.
Recognising When to Seek Help
Prompt attention to warning signs can prevent minor issues from becoming serious. Contact your dentist if you notice:
Persistent swelling, redness, or bleeding around implant sites
Increased pus discharge or drainage
Discomfort or pain when chewing or applying pressure
Mobility or movement of the restoration
Unusual taste or odour
Gum recession or significant changes in tissue appearance
Difficulty eating or speaking after a period of normal function
These symptoms may indicate peri-implantitis, implant failure, or a problem with the restoration itself. Early diagnosis and intervention can often prevent or limit bone loss.
Ongoing Support at Innova Dental
At Innova Dental in downtown Toronto, we recognise that implant treatment is a long-term commitment. Dr. Onur Cavus and our team are dedicated to supporting you through the full maintenance journey after your full-arch restoration is placed. We provide detailed hygiene instruction at placement, answer your questions at follow-up visits, and tailor our maintenance protocols to your individual anatomy and risk factors.
Whether your restoration is fixed or removable, we are here to help you achieve excellent long-term outcomes. Regular communication and adherence to a home care routine based on your restoration type can extend the life of your implants for decades.
FAQ: Oral Hygiene for Full-Arch Implants
Q: Can I use regular floss on a full-arch implant bridge?
A: Standard floss is generally not effective for cleaning under a full-arch bridge because the bridge sits very close to the gum tissue. Water flossers, interdental brushes, and floss threaders are far more practical for reaching the areas beneath the restoration. Your dentist can recommend the best tools for your specific restoration anatomy.
Q: How long does it take to clean my full-arch implants properly each day?
A: Most patients need 5 to 10 minutes for a thorough daily routine. This typically includes brushing with a soft toothbrush, using a water flosser to clean around and beneath the bridge, and using interdental brushes at each implant site. Spending adequate time on these steps is far more important than speed.
Q: What should I do if my gums bleed during cleaning?
A: Light bleeding when you first begin using water flossers or interdental brushes may occur as inflamed tissue begins to heal. However, persistent or heavy bleeding is not normal and may indicate early peri-implantitis or trauma to the tissues. Contact your dentist to discuss your cleaning technique and to rule out infection.
Q: Can peri-implantitis be treated, or will I lose my implant?
A: Early peri-implantitis can often be managed with improved hygiene, professional cleaning, and in some cases, antibiotics or antimicrobial therapy. However, advanced peri-implantitis with significant bone loss is much more difficult to treat and may result in implant loss. This is why prevention through excellent daily care and regular professional monitoring is so important.
This article is for informational purposes only and does not constitute dental or medical advice. For personalised guidance, consult a qualified dental professional.
Digital Dentistry in Toronto: What It Is and How It Benefits Patients
Digital dentistry refers to the use of digital technologies — including intraoral scanners, cone beam CT imaging, CAD/CAM restorations, and guided implant surgery — in diagnosis, treatment planning, and fabrication of dental work. This guide explains what each technology does, how it differs from traditional methods, and what patients can expect during a digital workflow appointment at a modern practice in Toronto.
If you've visited a modern dental practice recently, you may have noticed tablets, intraoral cameras, and digital displays in the treatment room. This shift towards digital dentistry is transforming how Toronto dentists diagnose, plan, and execute dental treatments. At Innova Dental, we integrate digital technologies throughout our clinical workflow to improve precision, patient communication, and overall care quality.
What Is Digital Dentistry?
Digital dentistry refers to the integration of digital technologies into diagnosis, treatment planning, and fabrication of dental restorations. Rather than relying solely on traditional analogue methods—such as physical impressions taken with impression putty, plaster stone models, and manual laboratory processes—digital dentistry uses optical scanning, 3D imaging, computer-aided design, and digital manufacturing to create a complete digital record and treatment plan. This shift allows dentists to visualise treatment outcomes before they begin, communicate more clearly with patients, and often achieve greater precision in the final restoration.
Intraoral Scanners: Replacing Traditional Impressions
One of the most tangible ways patients experience digital dentistry is through intraoral scanners. These handheld devices use optical technology to capture a precise three-dimensional digital model of your teeth and gums in just a few minutes. Instead of biting into impression putty—a process that can feel uncomfortable and trigger a gag reflex—the scanner simply moves around your mouth, photographing the tooth surfaces from multiple angles.
The resulting digital model is remarkably accurate and is immediately available on a computer screen. You can even view your own teeth in detail during your appointment. This digital record is then used for numerous clinical applications: designing and milling crowns and bridges, planning restorations around dental implants, creating accurate records for orthodontic cases, and visualising cosmetic changes through smile design software.
Intraoral scanners offer practical advantages beyond comfort. The digital file is immediately shareable with our laboratory partners or specialist consultants, eliminating the need to post physical models. Retakes are simple if a scan needs adjustment, and the data can be stored indefinitely for future reference without the bulk of traditional plaster models.
CBCT Imaging: Three-Dimensional Insight
Conventional dental X-rays provide a two-dimensional image—a flat picture of your teeth and bone. Cone beam computed tomography (CBCT) is different. This specialised imaging technology captures hundreds of individual X-ray images as it rotates around your head, then reconstructs them into a precise three-dimensional virtual model of your jaw, teeth, bone, nerves, and sinuses.
CBCT is invaluable in several clinical scenarios. Before placing a dental implant, CBCT allows your dentist to assess bone volume and density, identify the location of the inferior alveolar nerve (which runs through the lower jaw), and plan the exact position and angle for the implant. When assessing wisdom teeth for removal, CBCT shows whether nerves or sinuses are close by, helping your dentist anticipate potential complications. For root canal treatment, CBCT can reveal the complex internal anatomy of a tooth, whilst for bone grafting procedures, it helps visualise the graft site in three dimensions.
The additional diagnostic information from CBCT can improve treatment outcomes and reduce complications. Whilst not every patient needs CBCT for every procedure, it becomes particularly important for complex cases, and it is a standard part of pre-implant assessment.
Digital Smile Design and Treatment Planning
One of the most powerful applications of digital dentistry is digital smile design—the process of using high-quality photography and planning software to visualise proposed cosmetic or restorative changes before treatment begins. Your dentist photographs your smile from multiple angles, then uses software to adjust tooth position, size, shape, and colour, showing you a mockup of the potential outcome.
This collaborative approach means you and your dentist can discuss and refine the treatment plan together before any tooth is prepared or restored. Changes that looked appealing in person can be tested digitally, and any concerns can be addressed in advance. The digital design also guides the restorative work, ensuring the final result closely matches what was planned.
CAD/CAM Restorations: Precision Manufacturing
Computer-aided design and manufacturing (CAD/CAM) has revolutionised how dental restorations are made. After an intraoral scan is taken, the digital model is sent to design software where the restoration—whether a crown, bridge, veneer, or implant component—is designed to fit precisely with your adjacent teeth and opposing bite.
Once designed, the restoration is milled from a solid block of ceramic, composite, or other material using a precision milling machine, or it may be 3D printed depending on the material. This process is faster and often more accurate than traditional laboratory methods. Many restorations can be completed in a single appointment, reducing the need for temporary crowns or multiple visits.
The precision of CAD/CAM manufacturing typically results in better marginal fit (the closeness of the restoration edge to the tooth), improved contacts between teeth, and restorations that are less prone to cement washout or secondary decay at the margins.
Guided Implant Surgery
When multiple technologies converge, the results can be particularly impressive. Guided implant surgery combines CBCT imaging, intraoral scanning, digital implant planning software, and 3D-printed surgical guides to position dental implants with unprecedented precision.
Your dentist creates a three-dimensional plan using your CBCT scan and the digital scan of your teeth, determining the ideal position, angle, and depth for each implant relative to your bone anatomy and the position of your future crown. A custom surgical guide—a 3D-printed template that fits over your teeth or implant sites—is fabricated based on this plan. During surgery, the guide directs the placement of each implant to the exact specifications planned digitally.
This approach can reduce surgical complications, improve the fit of the final implant crown, and sometimes allow for immediate tooth replacement. It is particularly valuable when bone volume is limited or when multiple implants need to be coordinated, and it represents the standard of care for complex implant cases at Innova Dental.
What to Expect During a Digital Workflow Appointment
If you visit a practice using digital dentistry, your appointment will likely feel different from a traditional one. Rather than being asked to bite into putty, you may see an intraoral scanner. Instead of waiting days for a crown, you might have it milled in the practice whilst you wait. Digital images on screens will replace or supplement traditional plaster models, and you may be shown a digital preview of your treatment outcome.
This workflow typically requires less chair time for impression and fabrication steps, though some appointments may include more planning and discussion time upfront. The aim is to improve accuracy, reduce chair time, and enhance communication about what your treatment will achieve.
Why Digital Dentistry Matters for Your Care
Digital dentistry is not about technology for its own sake. The practical benefits are significant: greater precision in diagnosis and treatment planning, improved communication between you and your dentist, often faster treatment, and restorations that fit better and last longer. For complex cases like dental implants or cosmetic dentistry, digital planning can mean the difference between a good result and an excellent one.
At Innova Dental in downtown Toronto, we incorporate digital dentistry into our implant and restorative care to provide you with the most precise and predictable treatment possible. Whether you need a crown, dental implants at Innova Dental, or cosmetic dentistry, a digital workflow enhances every step of your care.
Frequently Asked Questions
What is the difference between digital dentistry and traditional dentistry?
Traditional dentistry relies on physical impressions (putty moulds), stone plaster models, and manual laboratory processes to design and fabricate restorations. Digital dentistry replaces these with optical scanning to create digital 3D models, computer-aided design software, and digital manufacturing (milling or 3D printing). The result is typically faster turnaround, greater precision, and better communication. Both approaches can yield excellent clinical outcomes, but digital workflows often reduce the number of appointment steps and improve the fit of final restorations.
Do I need CBCT imaging for a dental implant?
CBCT is considered standard in pre-implant assessment because it shows your bone anatomy, the position of nerves and sinuses, and allows your dentist to plan implant position precisely. Whilst some straightforward cases with excellent bone may proceed with conventional X-rays, CBCT typically provides information that improves safety and outcomes. Your dentist will assess whether CBCT is appropriate for your specific situation.
Can my crown be made in one appointment with digital dentistry?
Yes, in many cases. If your dentist uses an intraoral scanner and an in-office milling machine (often called CAD/CAM technology), a crown can be designed and milled whilst you wait, meaning the crown can sometimes be fitted in a single appointment. However, some cases may still require a laboratory-fabricated restoration, which takes longer. Your dentist will advise you on what is possible for your particular tooth and situation.
Is digital smile design guaranteed to match my final result?
Whilst digital smile design is an excellent planning tool that shows a realistic preview of proposed changes, the final result will depend on many factors including tooth structure, your bite, and the material used for the restoration. The digital design guides the work and helps you and your dentist align on goals, but it is a visual guide rather than a guarantee. Your dentist will discuss any limitations and ensure you understand what is achievable.
This article is for informational purposes only and does not constitute dental or medical advice. For personalised guidance, consult a qualified dental professional.
What Is IV Sedation Dentistry? A Patient's Guide
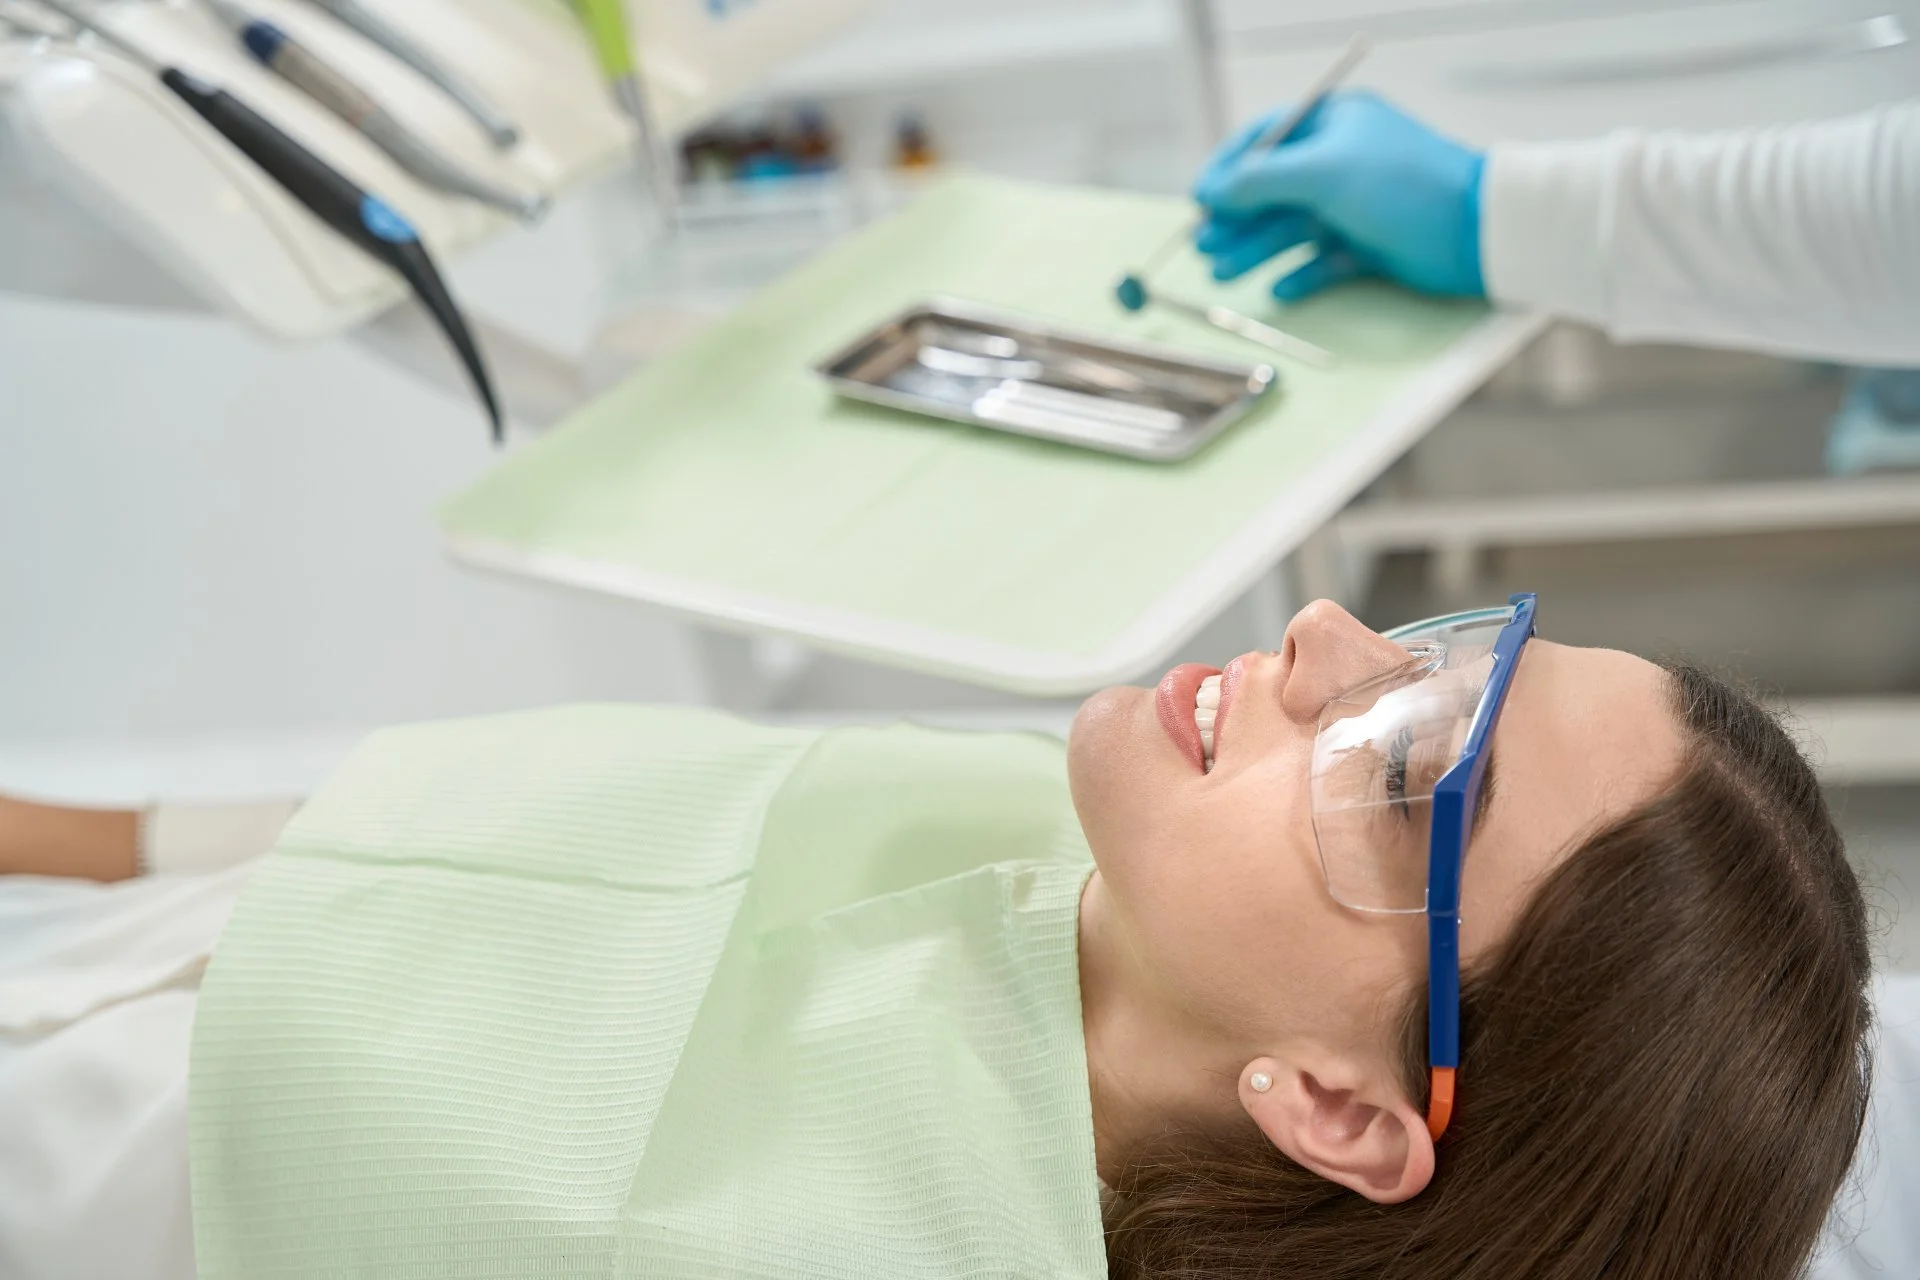
IV sedation dentistry, also known as conscious moderate sedation, uses intravenous medication to help patients remain deeply relaxed and largely amnesic during dental treatment — without the full unconsciousness of general anaesthesia. This guide explains how it works, how it differs from general anaesthesia, who it is best suited for, and what to expect before and during a sedation appointment at Innova Dental in Toronto.
For many people, anxiety about dental treatment prevents them from seeking care they need. If you experience dental fear or require complex procedures, IV sedation dentistry in Toronto offers an evidence-based solution that allows you to receive treatment comfortably while remaining conscious. This guide explains what IV sedation is, how it differs from general anaesthesia, who might benefit, and what to expect.
What Is IV Sedation Dentistry?
IV sedation dentistry, also known as conscious moderate sedation, is a pain and anxiety management technique in which sedative and analgesic medications are administered intravenously to relax a patient during dental treatment. A patient under IV sedation remains conscious and responsive—they can follow simple commands and maintain a natural airway—but enters a deeply relaxed state with significant amnesia, meaning they typically remember little to nothing of the procedure. This allows dentists to work efficiently while the patient experiences minimal anxiety or discomfort. IV sedation is different from general anaesthesia, in which a patient is completely unconscious and cannot be aroused by external stimuli; under IV sedation, you remain aware but in a profoundly calm mental state.
How Is IV Sedation Different from General Anaesthesia?
The distinction between IV sedation and general anaesthesia is clinically important and affects monitoring requirements, recovery time, and safety considerations.
Consciousness and Responsiveness
Under IV sedation, you remain conscious and can respond to verbal commands. A dentist might ask you to open your mouth wider or turn your head, and you can comply. Under general anaesthesia, you are completely unconscious and cannot be roused by external stimuli; an anaesthetist must manage your airway entirely.
Airway Management
With IV sedation, you maintain your own airway and breathe naturally. With general anaesthesia, the anaesthetist must manage your airway, often using an endotracheal tube or a supraglottic airway device.
Recovery Time
IV sedation typically involves a shorter recovery period. Most patients can be discharged within 30–60 minutes of the end of treatment, though they must have an escort and cannot drive on the day of the procedure. General anaesthesia recovery is usually longer and may require more intensive post-operative monitoring.
Monitoring and Cost
IV sedation requires less intensive monitoring infrastructure than general anaesthesia and is usually less costly. General anaesthesia, by contrast, typically takes place in a hospital or ambulatory surgical centre with full anaesthetic support.
Who Is a Suitable Candidate for IV Sedation?
IV sedation can benefit a range of patients, but it is important to have realistic expectations about what moderate IV sedation can and cannot achieve.
Complex or lengthy procedures. Patients undergoing procedures such as the removal of all four impacted wisdom teeth in a single session, full-arch implant surgery (All-on-X), or multiple restorative treatments completed in one appointment often benefit significantly from IV sedation. The combination of reduced anxiety, effective pain relief, and the amnesic effect means that lengthy or demanding procedures feel far shorter and less stressful.
A sensitive gag reflex. Sedation suppresses the gag reflex, making it easier for the dentist to work in the back of the mouth.
Difficulty sitting still or communicating. Some patients have trouble remaining stationary or communicating discomfort during treatment; sedation addresses both challenges.
Medical or psychological conditions. Patients with certain developmental or neurological conditions may find IV sedation helpful for dental care, subject to assessment.
IV Sedation and Dental Anxiety: Knowing What to Expect
For patients with mild to moderate dental anxiety, moderate IV sedation — particularly when used alongside non-pharmacological anxiety reduction strategies such as clear communication, a calm clinical environment, and paced treatment — can make a meaningful difference to the overall experience. Many patients in this group find that IV sedation allows them to complete treatment they had previously avoided.
However, it is important to understand what moderate IV sedation does not provide. You remain conscious and responsive throughout. If your expectation is to be completely unaware — to have no sense of the procedure whatsoever, as with a general anaesthetic — moderate IV sedation will not meet that expectation. Patients with moderate to severe dental anxiety who are seeking a level of unawareness beyond what conscious sedation can offer may require deeper levels of sedation or general anaesthesia. These options fall outside the scope of general dentistry and are best provided by a dental anaesthesiologist in an appropriate facility. If you feel this may apply to you, your dentist can discuss a referral to a specialist anaesthesia provider.
Not everyone is a candidate for IV sedation. Your medical history, current medications, and any underlying health conditions (such as uncontrolled high blood pressure, severe sleep apnoea, or active infection) will be assessed during a pre-operative consultation.
What to Expect Before Your IV Sedation Appointment
Pre-operative Consultation
Before sedation, you will attend a consultation with Dr. Cavus to discuss your dental needs, medical history, medications, allergies, and any concerns. This appointment allows your dentist to assess your suitability for IV sedation and explain the procedure in detail.
Fasting Requirements
You must fast before IV sedation. Typically, you should not eat solid food for six hours before your appointment and avoid clear liquids for two hours prior. Fasting reduces the risk of aspiration, a rare but serious complication. Your dentist will provide detailed pre-operative instructions specific to your appointment time.
An Escort Is Required
Because IV sedation affects memory and reaction time, you cannot drive yourself home. You must arrange for a responsible adult to accompany you and remain throughout your appointment. This person will drive you home and remain with you for several hours afterward.
Medication Adjustments
If you take regular medications, discuss with Dr. Cavus whether you should continue them on the morning of your appointment. Some medications may need to be adjusted or taken with a sip of water; others should be paused.
What Happens During Your IV Sedation Appointment
When you arrive, you will be positioned comfortably in the treatment chair. A small IV catheter is placed in your arm, usually without discomfort. Dr. Cavus will then slowly administer the sedative and pain-relief medications. Within a few minutes, you will feel deeply relaxed, and the procedure begins. You remain conscious enough to respond to simple commands, but you will have little awareness of time passing. Many patients report that "it felt like five minutes when it was actually an hour."
Throughout the procedure, your oxygen level, heart rate, and blood pressure are continuously monitored to ensure your safety. You will be monitored continuously until the sedation wears off, at which point you will return home with your escort. You may feel groggy for the remainder of the day, and some patients experience mild nausea or dizziness, though this is rare.
Recovery and Post-operative Care
After your appointment, plan to rest for the remainder of the day. Avoid strenuous activity, using machinery, or making important decisions for at least 24 hours. Some grogginess is normal and should resolve within a few hours. You may eat a light meal once you feel ready and drink plenty of water. Your dentist will provide detailed post-operative instructions and arrange a follow-up appointment to check your recovery.
IV Sedation Dentistry at Innova Dental
At Innova Dental in downtown Toronto, Dr. Onur Cavus is RCDSO-certified to administer moderate IV sedation. With over 20 years' experience in implant dentistry and oral surgery, Dr. Cavus combines clinical expertise with a patient-centred approach to help patients access complex dental care comfortably. IV sedation at Innova Dental is most suited to patients undergoing complex or lengthy procedures, or those with mild to moderate dental anxiety who want a calmer, more manageable treatment experience. For patients whose anxiety is more severe, or who require a deeper level of sedation than conscious moderate sedation provides, Dr. Cavus can discuss whether a referral to a dental anaesthesiologist is appropriate. To find out whether IV sedation is right for your situation, contact Innova Dental at info@innovadental.ca.
Frequently Asked Questions
Is IV sedation the same as being put to sleep?
No. IV sedation is conscious moderate sedation — you remain conscious and responsive throughout, even though you may have little memory of it afterward. You breathe independently and can respond to simple commands. This is clinically distinct from general anaesthesia, in which a patient is rendered fully unconscious and requires managed airway support. If you are expecting a level of unawareness similar to general anaesthesia, it is important to discuss this with your dentist before booking, as moderate IV sedation may not meet that expectation. Patients who require deeper sedation or general anaesthesia for dental treatment are best served by a dental anaesthesiologist.
Will I feel any pain during the procedure?
IV sedation includes pain relief medication, so you should not experience pain. If you do feel discomfort, simply signal your dentist, who can adjust the medication. Most patients report feeling nothing at all during treatment.
How long does the sedation last?
The sedative medications begin to wear off as soon as the IV is stopped, though full recovery takes several hours. Most patients are alert enough to be discharged 30–60 minutes after the procedure ends, but you will be groggy and must not drive. Avoid operating machinery or making important decisions for the remainder of the day.
What are the risks of IV sedation?
IV sedation is generally safe when administered by a qualified, RCDSO-certified provider in a properly equipped dental office. Serious adverse events are rare. Minor side effects—such as brief nausea, dizziness, or a bruise at the IV site—may occur but typically resolve quickly. Your dentist will discuss specific risks during your consultation.
This article is for informational purposes only and does not constitute dental or medical advice. For personalised guidance, consult a qualified dental professional.
All-on-X Full Arch Implants in Toronto: A Complete Guide
All-on-4 and All-on-6 implant treatments offer a way to restore a full arch of teeth using just four or six strategically placed implants. This guide explains how full-arch implant rehabilitation works, who is a suitable candidate, how fixed prosthetics differ from removable overdentures, and what the treatment journey looks like from consultation through to final restoration.
If you have lost multiple teeth or are facing tooth extraction, you may have heard about All-on-4 and All-on-6 implant treatments. These solutions offer a practical way to restore a full arch of teeth using dental implants. At Innova Dental in Toronto, we provide comprehensive full-arch implant rehabilitation using these evidence-based approaches.
What Are All-on-X Dental Implants?
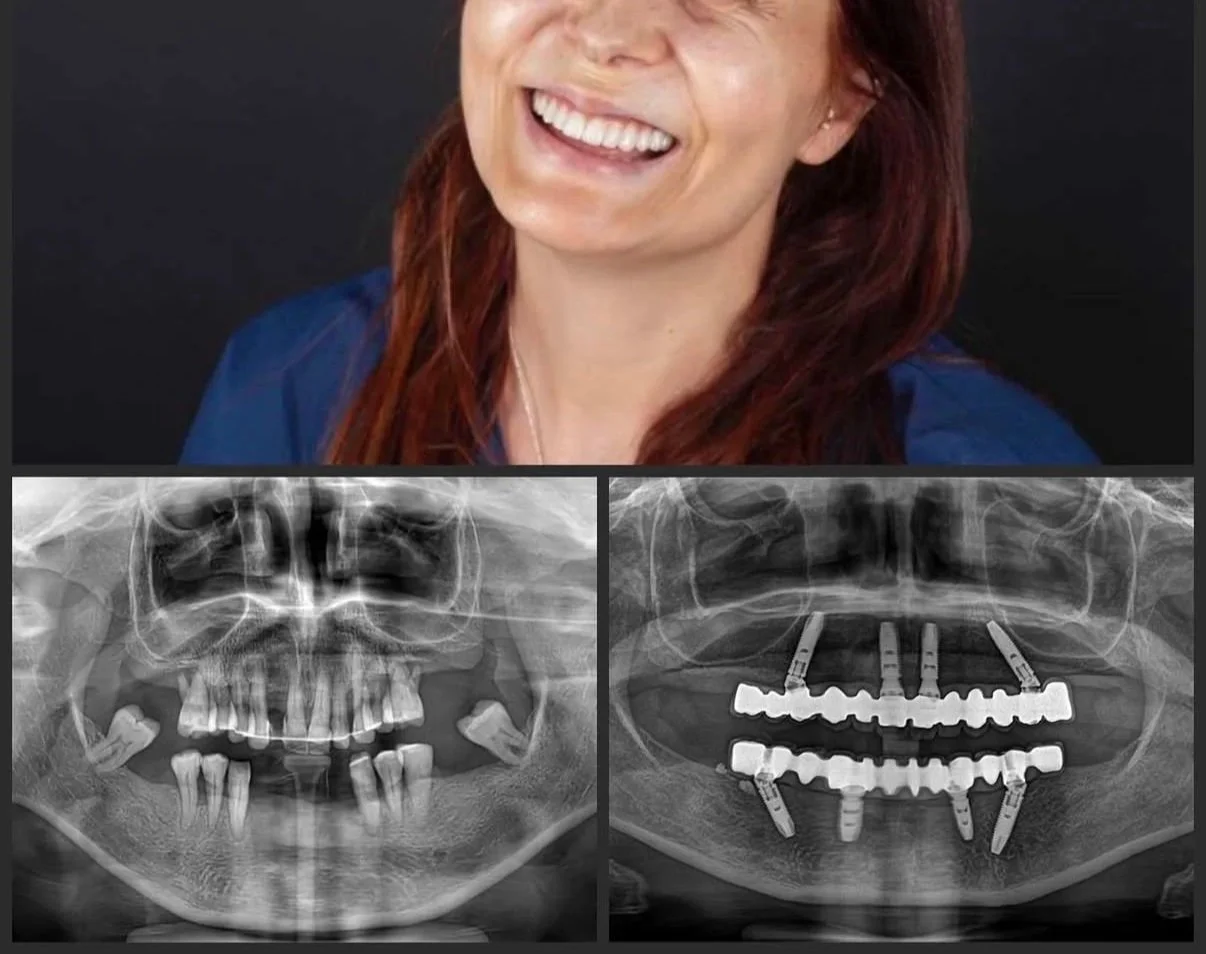
All-on-X full-arch implants represent a modern solution for replacing an entire row of teeth—upper, lower, or both—using a fixed or removable prosthesis supported by a small number of dental implants. In the most common approach, four strategically angled implants support a complete fixed denture; this is called All-on-4. Some cases benefit from six implants (All-on-6), offering additional support and stability. Rather than replacing each missing tooth with an individual implant, the All-on-X technique uses fewer implants positioned at specific angles to distribute forces evenly across the jawbone. A tooth-coloured prosthesis is then anchored permanently or removably onto these implants, restoring chewing function, appearance, and speech in a single restoration.
How All-on-X Implant Positioning Works
The Angled Implant Principle
The key innovation behind All-on-4 and All-on-6 treatments is implant positioning. Rather than placing all implants vertically, the outer two (or four, in All-on-6) are angled between 30 and 45 degrees. This strategic angulation offers several biomechanical advantages:
Increased bone contact: Angled implants can reach denser bone further back in the jaw, even when significant bone loss has occurred, avoiding the need for bone grafting in many cases.
Better load distribution: The angled positioning distributes chewing forces more evenly across the implant-supported structure.
Posterior cantilever span: Angled implants allow the prosthesis to extend back further, supporting more teeth without additional implants.
The central implants typically remain vertical to support the front teeth. This combination of vertical and angled implants creates a stable foundation that works with your natural jaw anatomy.
All-on-4 Versus All-on-6
All-on-4 uses four implants: two vertical in the front and two angled at the back. This approach is suitable for many patients, particularly those with good general health and adequate bone volume.
All-on-6 places six implants in a similar pattern but with additional support in the molar regions. The extra implants can provide greater stability and longevity, particularly for patients who grind their teeth, have specific bone anatomy, or prefer maximum long-term durability. Your dentist will recommend which approach suits your situation based on bone structure, health history, and individual needs.
Full-Arch Implant Options: Fixed or Removable
All-on-X treatments come in two main configurations, each with distinct advantages.
Fixed Hybrid or Composite Prosthetics
A fixed prosthesis is permanently secured to the implants via screws or cement. You cannot remove it yourself. Benefits include:
Appearance identical to natural teeth
No daily removal or cleaning routine beyond normal brushing and flossing
Improved speech and eating comfort compared to removable options
Psychological confidence of a permanent restoration
Maintenance involves standard oral hygiene plus regular professional cleaning. If repairs are needed, your dentist may need to access the screw holes or remove sections of the prosthesis.
Removable Implant-Supported Overdentures
A removable prosthesis (overdenture) clicks or snaps onto the implants, held in place by special attachments. Advantages include:
Lower initial cost than fixed prosthetics in most cases
Easier for patients to clean and maintain at home
Simpler repairs and adjustments
Less complex laboratory and clinical fabrication
The trade-off is daily removal, cleaning, and reinsertion, similar to a traditional denture but more stable and functional.
Your dentist will discuss which option aligns with your preferences, budget, bone anatomy, and lifestyle.
Who Is a Candidate for All-on-X Implants?
Ideal candidates for full-arch implant treatment typically have these characteristics:
Multiple missing teeth or teeth requiring extraction in one or both arches
Adequate jawbone volume and density, though angled implants can work even when some bone loss has occurred
Good general health, without uncontrolled diabetes, active periodontal disease, or other conditions that compromise healing
Realistic expectations about treatment duration, outcomes, and ongoing care
Commitment to oral hygiene and maintenance throughout the implant's lifespan
Stable medication profile — certain medications may affect bone healing and should be reviewed during consultation
If you have significant bone loss, your dentist may recommend bone grafting before implant placement. Other factors, such as smoking or heavy teeth grinding, may influence your suitability and will be assessed during your consultation.
The Role of IV Sedation in Full-Arch Treatment
Full-arch implant placement is a lengthy surgical procedure, often taking several hours. Many patients find conscious moderate IV sedation beneficial during this phase of treatment.
IV sedation places you in a deeply relaxed, amnesic state—you remain conscious and responsive, but have no recall of the procedure and experience minimal discomfort. This is distinct from general anaesthesia, where you are fully asleep. At Innova Dental, Dr. Cavus is RCDSO-certified in moderate IV sedation and can administer this safely in our clinic.
IV sedation during implant placement offers:
Reduced anxiety and stress during the procedure
Amnesia of the surgical experience
Ability for longer appointments without fatigue or movement
Better surgical conditions for the dentist due to patient comfort and stillness
IV sedation is not suitable for everyone and requires thorough assessment of your health history, medications, and ability to arrange post-operative care. Your dentist will discuss whether moderate sedation is appropriate for you.
The Full-Arch Implant Treatment Journey
Consultation and Planning
Your first appointment involves comprehensive assessment: examination of your teeth and bone, imaging (often including CBCT), discussion of your goals, and review of medical history. If IV sedation is under consideration, additional screening occurs. You will receive a detailed treatment plan, cost estimate, and timeline.
Implant Placement
The surgical phase places the implants into the jawbone under local anaesthesia (with or without IV sedation, depending on your plan). The gums are carefully sutured, and a healing period of several months follows while bone integrates with the implant surfaces. Many patients receive a temporary prosthesis immediately or very shortly after implant placement, allowing them to maintain function and appearance during healing.
Prosthesis Fabrication
Once osseointegration is complete (typically 4–6 months), impressions are taken and the final fixed or removable prosthesis is designed and fabricated. This phase may involve multiple appointments for fit adjustments and colour matching.
Delivery and Adjustment
The final prosthesis is secured to the implants, and adjustments are made to ensure comfortable biting and proper alignment. Your dentist will provide detailed instructions for cleaning and maintenance.
Long-Term Care
After delivery, regular check-ups (typically every 6 months) monitor implant health and prosthesis condition. Professional cleaning removes tartar and plaque in areas difficult to reach at home. With consistent care, full-arch implants often remain functional for 10–15 years or longer.
Choosing Full-Arch Implants in Toronto
Innova Dental, located in downtown Toronto, offers comprehensive full-arch implant rehabilitation. Dr. Onur Cavus is a general dentist with extensive clinical experience in implant dentistry, and certified to administer moderate IV sedation.
Whether you are exploring full arch implants Toronto for the first time or seeking a second opinion, our team is here to answer your questions and develop a treatment plan tailored to your needs.
For further information about dental implants at Innova Dental or to discuss IV sedation dentistry, contact us at smile@innovadental.ca or schedule a consultation.
Frequently Asked Questions
How long does the entire All-on-4 process take?
The total timeline typically spans 6–9 months from consultation to final prosthesis delivery. Implant placement itself is a single surgical appointment (2–4 hours), followed by 4–6 months of bone healing. Prosthesis design and fabrication usually takes 4–8 weeks. Some patients receive a temporary prosthesis immediately after implant placement, allowing them to maintain function and appearance during healing.
Can I eat normally with All-on-X implants?
Yes, most patients regain substantially normal chewing ability once the final prosthesis is delivered and the healing period is complete. Initially (during the first few weeks after implant placement), a soft diet is recommended. Once your dentist confirms that bone has integrated with the implants, you can typically eat most foods. Extremely hard or sticky foods should be avoided, as they can damage the prosthesis.
What is the cost of All-on-4 implants in Toronto?
Cost varies depending on implant materials, prosthesis type (fixed or removable), bone grafting requirements, use of IV sedation, and clinical complexity. At Innova Dental, a detailed cost estimate is provided during your consultation after examining your specific situation. Many dental insurance plans cover a portion of implant-related treatment; your dentist can review your coverage and discuss financing options.
Are All-on-X implants permanent?
Dental implants themselves can last 20–30 years or longer with consistent care; some remain stable for a lifetime. The prosthesis (the artificial teeth) typically lasts 10–15 years before needing repair, refurbishment, or replacement due to normal wear and material fatigue. Regular maintenance and professional cleaning significantly extend the lifespan of both implants and prosthesis.
This article is for informational purposes only and does not constitute dental or medical advice. For personalised guidance, consult a qualified dental professional.
Wisdom Teeth Removal in Toronto: What to Expect
Wisdom teeth removal is one of the most common dental procedures performed for adults in Toronto. This guide explains why wisdom teeth are removed, what to expect during simple and surgical extractions, how impacted wisdom teeth are assessed, and what recovery involves — including when a coronectomy may be the right approach.
Wisdom teeth removal is one of the most common dental procedures, yet it often generates significant anxiety in patients who are facing it for the first time. Whether you're experiencing pain from an emerging wisdom tooth or have been advised by your dentist that extraction is necessary, understanding what the procedure involves and what recovery looks like can help ease your concerns. At Innova Dental in downtown Toronto, we specialise in wisdom teeth removal and provide clear, honest information to help patients make informed decisions about their oral health.
What Is Wisdom Tooth Removal?
Wisdom teeth removal is a procedure in which one or more of the third molars (wisdom teeth) are extracted from the jaw. Wisdom teeth are the last permanent teeth to erupt, typically appearing in the late teens or early twenties. Tooth extraction involves loosening the tooth from its socket and carefully removing it, along with the surrounding bone and soft tissue support. In some cases, the tooth may need to be sectioned into smaller pieces to facilitate removal. The procedure can be performed under local anaesthetic alone, or with additional sedation options to enhance patient comfort. Recovery typically takes one to two weeks, though complete bone healing continues for several months.
Why Wisdom Teeth Are Removed
Most adults have four wisdom teeth—one in each corner of the mouth. However, many people benefit from having them extracted for several reasons.
Lack of Space
The human jaw has become smaller over generations, and many people simply don't have enough space for their wisdom teeth to erupt properly. When a wisdom tooth tries to push through without adequate room, it can crowd nearby teeth or cause misalignment of your existing bite.
Pain and Infection
Partially erupted or impacted wisdom teeth can create pockets where bacteria accumulate, leading to infection and inflammation of the gums. This can cause significant pain, swelling, and difficulty cleaning the area. In some cases, cysts may form around an impacted tooth, which requires extraction to prevent bone damage.
Decay and Gum Disease
Because wisdom teeth are located at the back of the mouth, they're harder to clean properly with a toothbrush and floss. This makes them more susceptible to decay and periodontal disease. If a wisdom tooth is extensively decayed or surrounded by diseased tissue, extraction is often the most practical option.
Orthodontic Considerations
If you've had orthodontic treatment or are planning to have braces fitted, your dentist may recommend wisdom tooth removal to prevent post-treatment crowding.
Simple vs. Surgical Extractions
Not all wisdom teeth extractions are the same. The complexity of the procedure depends on whether the tooth has fully erupted and is accessible, or whether it remains partially or completely beneath the gum line.
Simple Extractions
A simple extraction is performed when the wisdom tooth has fully erupted through the gum and is visible in the mouth. The tooth is loosened using specialised instruments and removed whole. This procedure typically takes 15–30 minutes and can usually be performed under local anaesthetic alone. Discomfort during the procedure is minimal, though you'll feel pressure and vibration.
Surgical Extractions
A surgical extraction is necessary when the wisdom tooth is impacted—meaning it remains partially or completely embedded beneath the gum or bone. During a surgical extraction, your dentist or oral surgeon makes an incision in the gum to access the tooth. Depending on the tooth's position, it may be sectioned into smaller pieces for easier removal. Surgical extractions typically take longer (30–60 minutes) and often require stronger sedation for patient comfort.
Understanding Impacted Wisdom Teeth
An impacted wisdom tooth is one that cannot erupt normally due to lack of space, bone obstruction, or an unusual angle of growth. Impacted teeth are categorised by their position relative to the jaw bone and gum line.
Soft tissue impaction occurs when the tooth has penetrated the bone but remains covered by gum tissue. Partial bone impaction means the tooth is embedded in bone but partially visible. Complete bone impaction—the most complex scenario—occurs when the tooth is entirely enclosed in bone.
Impacted wisdom teeth often show no symptoms, but they can cause problems over time. They're more prone to decay and gum disease, and they may develop cysts or damage adjacent teeth. Your dentist may recommend extraction even if an impacted wisdom tooth isn't currently causing pain, to prevent future complications.
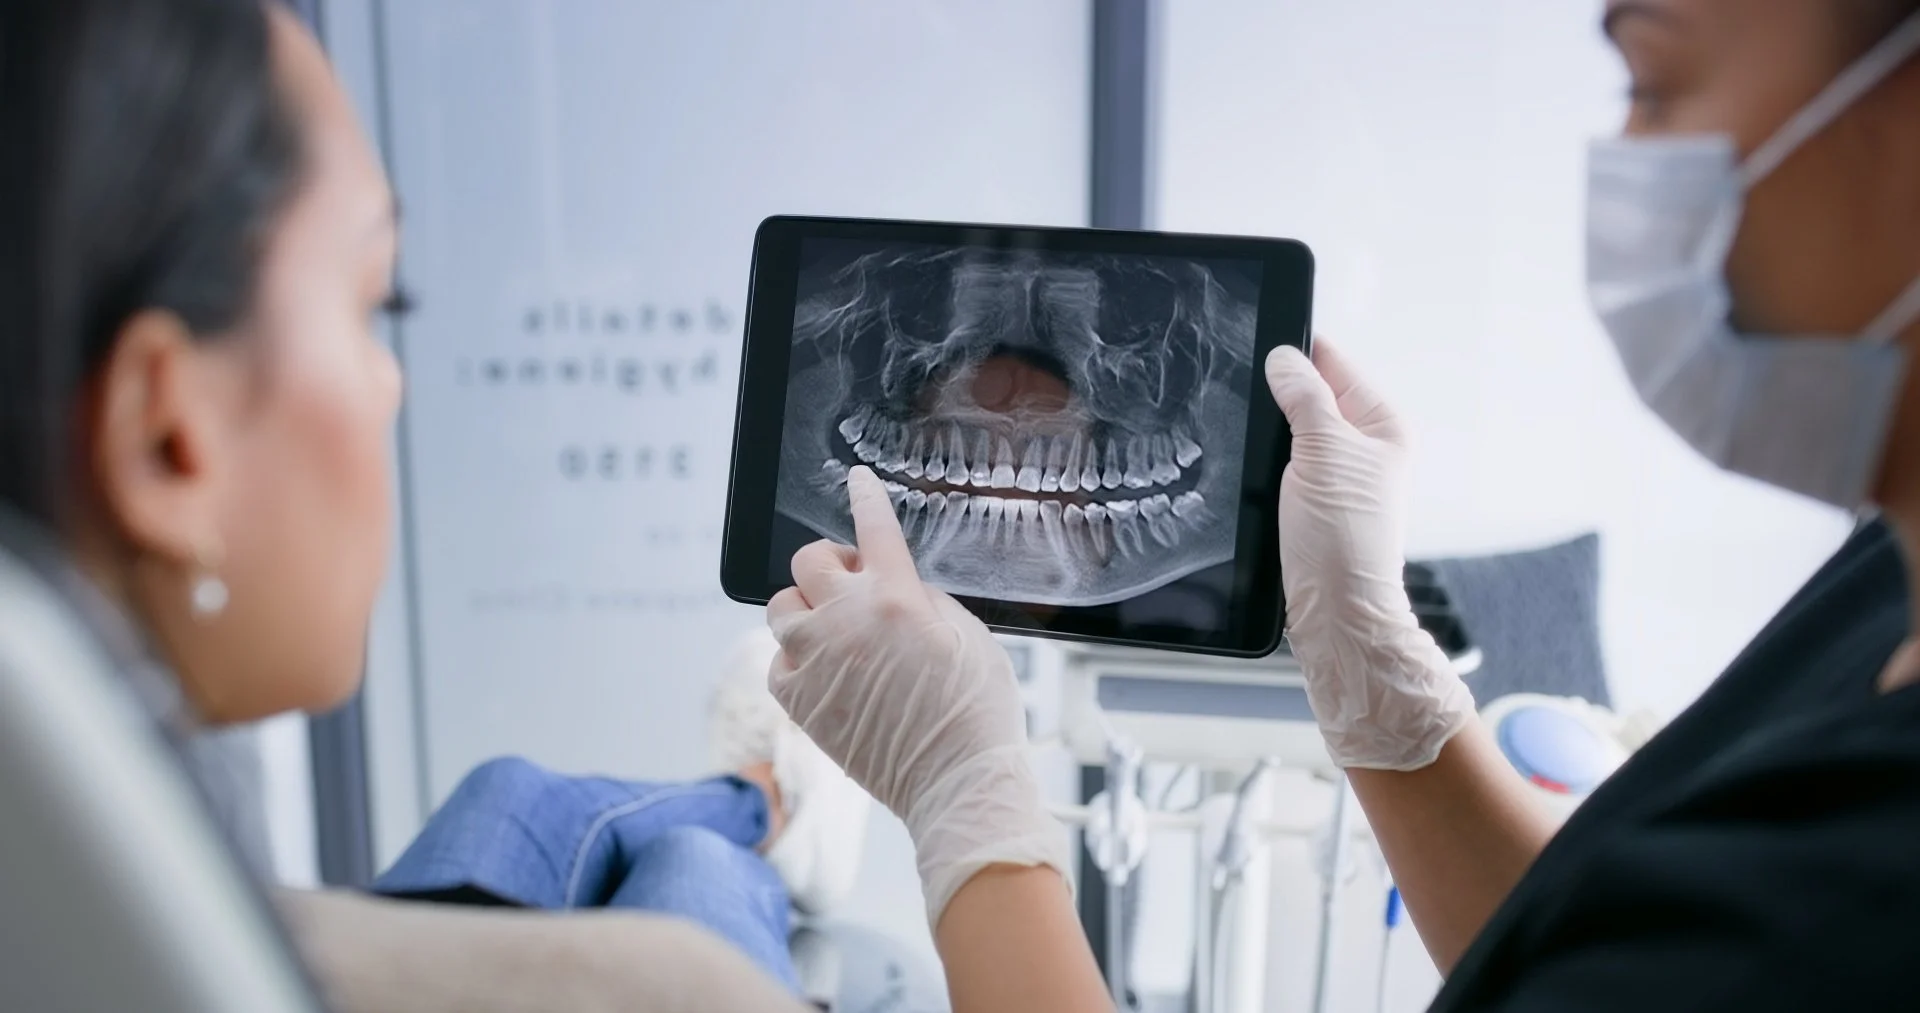
CBCT (cone beam computed tomography) imaging is often used to assess impacted wisdom teeth. This three-dimensional imaging technology allows your dentist to visualise the tooth's exact position, its relationship to nearby nerves and sinuses, and the bone density surrounding it. This information helps plan the safest and most efficient extraction approach.
Recovery and Aftercare
Recovery from wisdom teeth removal varies depending on whether you had a simple or surgical extraction. Most patients experience swelling, bruising, and discomfort for the first three to five days.
During the first 24 hours, avoid rinsing, spitting, or drinking through a straws, as these actions can dislodge the blood clot that protects the extraction site. Ice packs applied for 15 minutes at a time can reduce swelling. After 48 hours, warm salt water rinses (half a teaspoon of salt in a cup of warm water) can help keep the area clean.
Over-the-counter pain relief medications such as paracetamol or ibuprofen are usually sufficient for managing discomfort. Some swelling and bruising may persist for one to two weeks. Most people feel well enough to return to light activities within three to five days, though strenuous exercise should be avoided for at least a week.
Complete healing of the bone takes several months, but the socket will gradually fill in with bone tissue. Your dentist may recommend a follow-up appointment one to two weeks after extraction to ensure healing is progressing normally.
Sedation Options for Wisdom Tooth Procedures
For many patients, the anxiety associated with wisdom teeth removal can be as challenging as the procedure itself. At Innova Dental, IV sedation is available for wisdom tooth procedures, allowing you to remain relaxed and comfortable throughout your appointment. This option is particularly beneficial for surgical extractions or for patients with dental anxiety. You should arrange for someone to drive you home if you choose sedation, as you won't be able to drive immediately after the procedure.
Coronectomy: An Alternative Approach
In some cases, when a wisdom tooth is impacted very close to the inferior alveolar nerve (the main nerve in the lower jaw), your dentist may recommend a coronectomy rather than complete extraction. Coronectomy involves removing the crown (upper portion) of the tooth while leaving the root tip buried in the bone. This approach reduces the risk of nerve damage.
While leaving a root tip might sound concerning, research shows it's often harmless. The retained root is typically small and does not cause problems. However, coronectomy is not suitable for all situations and is only recommended when the risk of nerve injury from complete extraction is significant. Your dentist will discuss whether this option applies to your situation.
FAQs
How long does wisdom tooth removal take?
A simple extraction typically takes 15–30 minutes, whilst a surgical extraction of an impacted tooth may take 30–60 minutes or longer, depending on the tooth's position and complexity. The time varies based on whether you're having one or multiple teeth removed.
Will I experience pain during the procedure?
Local anaesthetic numbs the tooth and surrounding tissue, so you shouldn't feel pain during extraction. You may feel pressure, vibration, or hear sounds as the tooth is loosened and removed, but discomfort should be minimal. If you experience pain at any point, inform your dentist immediately—they can administer additional anaesthetic.
How much swelling should I expect after removal?
Swelling typically peaks around 48–72 hours after extraction and gradually subsides over one to two weeks. The amount of swelling varies depending on how complex the extraction was and how well you follow post-operative instructions. Ice application and elevation of your head can help reduce swelling.
Can I return to work after wisdom teeth removal?
Most people can return to light desk work within a few days, though the first 24 hours should involve complete rest. If your job involves physical labour or speaking extensively, you may need a few extra days. Avoid strenuous activity for at least one week to prevent complications such as dry socket.
This article is for informational purposes only and does not constitute dental or medical advice. For personalised guidance, consult a qualified dental professional.
Dental Implants in Toronto: What You Need to Know Before Treatment
Dental implants are one of the most effective long-term solutions for missing teeth, but understanding the process before you begin makes a significant difference. This guide covers how implants work, what osseointegration means, who is a suitable candidate, when bone grafting may be needed, and how full-arch implants (All-on-X) differ from single-tooth treatment.
If you have lost one or more teeth, you may have heard about dental implants as a treatment option. Many patients considering implants in Toronto have questions about how they work, whether they are suitable for them, and what to expect during the process. This guide will walk you through the essential information about dental implants, from how they function to the factors that determine whether you are a good candidate for treatment.
What Are Dental Implants?
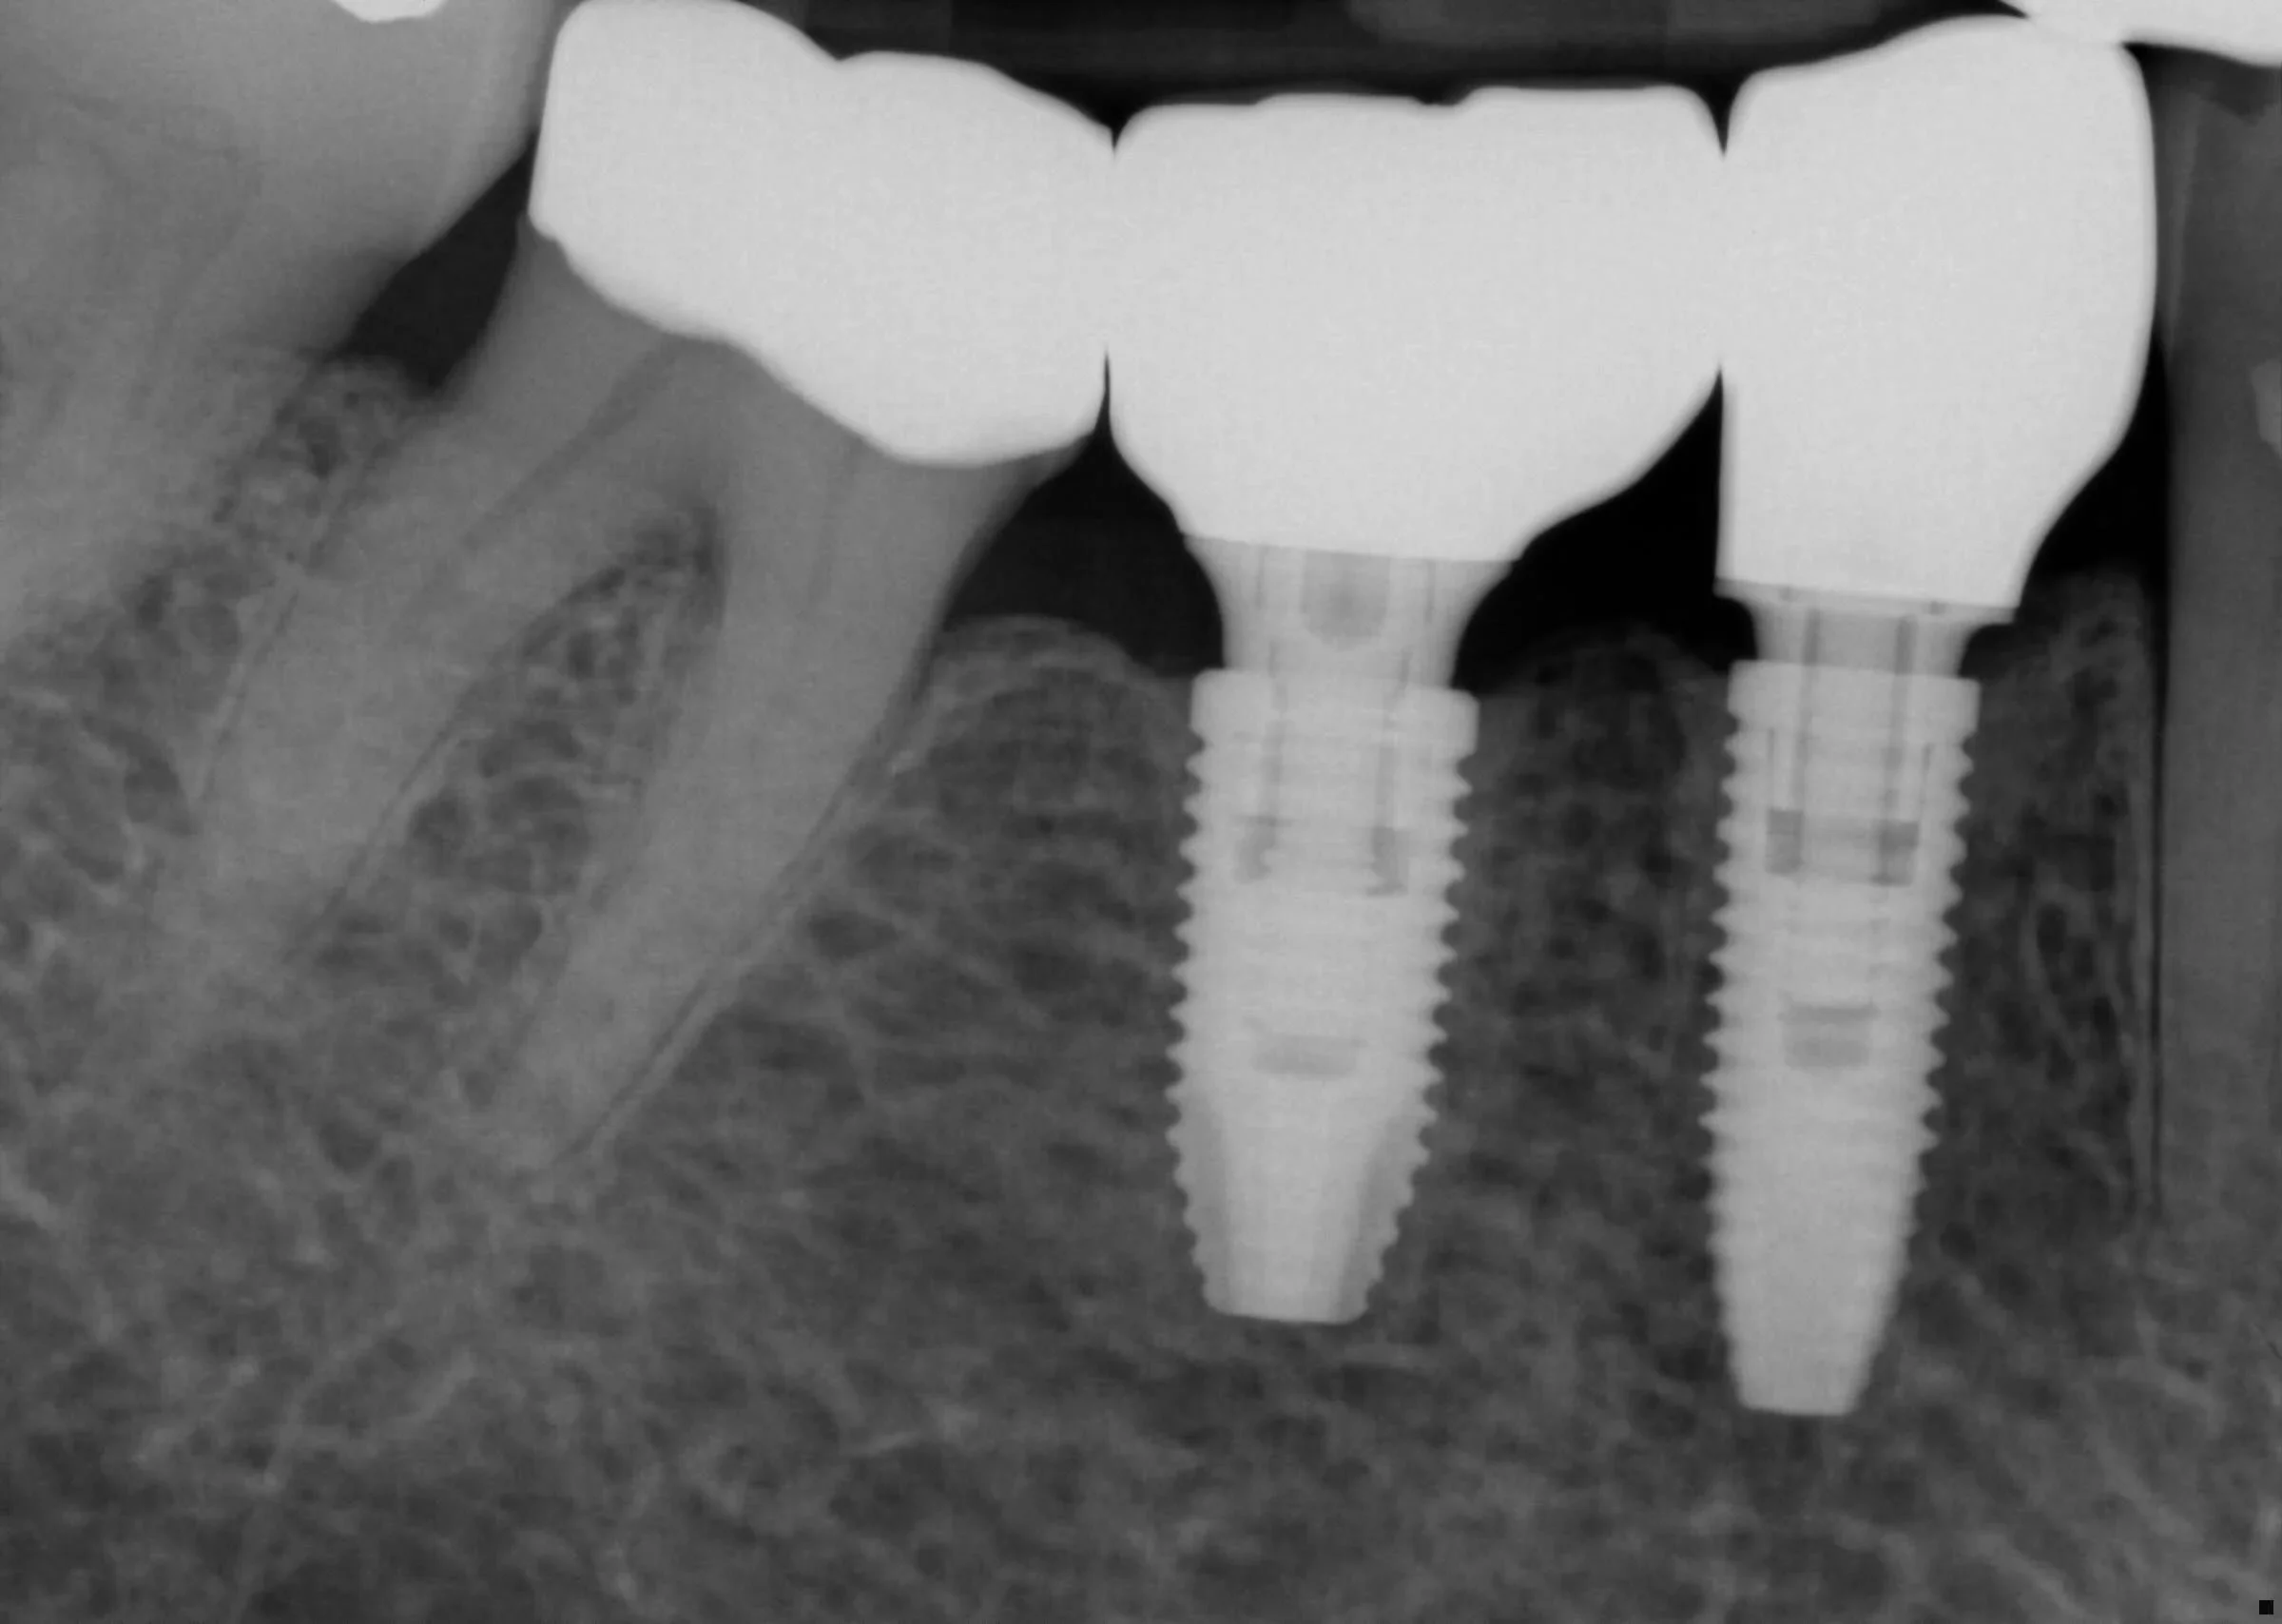
Dental implants are artificial tooth roots made from titanium that are surgically placed into the jawbone to support replacement teeth. The implant itself sits beneath the gum line, anchored directly into the bone, and serves as a foundation for a crown, bridge, or denture. Because they integrate with the bone over time through a process called osseointegration, implants provide a stable, long-lasting solution for missing teeth that functions much like a natural tooth would. Unlike bridges or dentures, implants do not rely on adjacent teeth for support and can help preserve bone structure in the jaw. Dental implants at Innova Dental are placed using proven surgical techniques and followed by a carefully planned restorative phase to ensure optimal function and appearance.
How the Dental Implant Procedure Works
The journey to receiving dental implants typically unfolds in two main phases: the surgical placement of the implant and the restorative phase, where the crown or other restoration is attached.
Surgical Placement
During the surgical phase, a small incision is made in the gum to access the underlying bone. A series of precision drills are used to create a channel in the bone that matches the size and shape of the implant. The titanium implant is then carefully inserted into this space. Once placed, the gum is closed over the implant with sutures, and the bone begins to heal around it.
This procedure can be performed under local anaesthetic alone or with IV sedation if you prefer to be sedated. IV sedation is available at Innova Dental and allows many patients to feel relaxed and comfortable throughout the appointment. Recovery after implant placement typically takes 7 to 10 days, during which you may experience some swelling, bruising, or mild discomfort.
Osseointegration
After the implant is placed, a period of healing and integration begins. This process, called osseointegration, involves the bone gradually binding to the titanium surface of the implant. This typically takes 3 to 6 months, depending on the location in the jaw and the quality of your bone. During this time, the implant becomes increasingly stable and strong. You will be advised to avoid chewing on the surgical site and to follow post-operative care instructions carefully.
Restorative Phase
Once osseointegration is complete, your dentist will attach an abutment—a small connector piece—to the top of the implant. The artificial crown, which looks and feels like a natural tooth, is then secured onto the abutment. This phase involves taking impressions, selecting the colour and shape of the tooth, and ensuring proper fit and bite alignment. The restorative phase can take several weeks, and both the surgical placement and restoration can be completed at Innova Dental.
Candidacy: Who Can Have Dental Implants?
Not everyone is automatically suitable for dental implants, and your dentist will assess several factors to determine whether this treatment is appropriate for you.
Bone Volume and Density
Dental implants require adequate bone in the jaw to support them. Your dentist will take X-rays or 3D scans to assess the volume and quality of bone available. In some cases, bone density in the jaw may have decreased due to years without a tooth, and additional bone may be needed before an implant can be placed.
Overall Health
Certain health conditions, such as uncontrolled diabetes or autoimmune disorders, can affect bone healing and the success of implants. During your consultation, your dentist will discuss your medical history and any medications you are taking. Most people with common health conditions can still receive implants, but your specific situation will be carefully evaluated.
Bone Grafting
If you do not have sufficient bone, bone grafting may be an option. This procedure involves adding bone material to the deficient area to build up the jaw. Bone grafts can be taken from your own bone (the most predictable option), from a donor source, or from bone substitute materials. Grafting may extend your overall treatment timeline by several months, but it can make implant placement possible when bone volume is limited.
Single Implants vs. Full-Arch Implants
Dental implants can replace a single missing tooth or multiple teeth. The approach varies depending on how many teeth need to be replaced.
Single Tooth Implants
A single implant with a crown is often the ideal solution for one missing tooth. The implant does not affect adjacent teeth, and the restoration can be made to match your natural teeth closely. No special maintenance is required beyond normal brushing and flossing.
Multiple Teeth and Full-Arch Solutions
When several teeth are missing or need to be replaced, your options include multiple individual implants, an implant-supported bridge, or a full-arch restoration. Full-arch implants, often referred to as All-on-X (where X is typically 4 or 6 implants), support a complete set of replacement teeth using a smaller number of implants. This approach can be more efficient and cost-effective than placing individual implants for every missing tooth. Full-arch treatments can often be completed as a fixed (non-removable) bridge or as a removable denture that clips onto the implants for stability and retention.
Life After Dental Implants
Once your implant-supported restoration is in place, care is straightforward. Brush and floss as you would with natural teeth, and maintain regular dental check-ups. Implants cannot develop decay, but the bone and gum around them require good hygiene and professional maintenance. Most implants, with proper care, can last many years or even a lifetime.
Why Choose Innova Dental for Implants in Toronto
Innova Dental is located in downtown Toronto and will open in 2027. Dr. Onur Cavus, an RCDSO-licensed general dentist, brings more than 20 years of clinical experience in implant dentistry. Both the surgical placement of implants and the restorative phase are available at the clinic, allowing you to receive comprehensive care from start to finish. IV sedation services are also available to help you feel comfortable throughout your treatment. For more information or to schedule a consultation, contact Innova Dental at smile@innovadental.ca.
Frequently Asked Questions
How long do dental implants last?
With proper care and good oral hygiene, dental implants can last for many years or even a lifetime. The implant itself is designed to be permanent, though the crown or restoration may need to be replaced or adjusted over time due to normal wear. Regular dental check-ups and consistent home care are key to maximising the lifespan of your implant.
Is implant surgery painful?
The surgical area is numbed with local anaesthetic during the procedure, so you should not feel pain during placement. You may feel pressure or vibration, but not sharp pain. After surgery, some discomfort or soreness is normal for a few days and can usually be managed with over-the-counter pain relief and ice. Your dentist will provide detailed post-operative instructions to help minimise discomfort during the healing process.
How much do dental implants cost?
The cost of dental implants varies depending on factors such as the number of implants needed, whether bone grafting is required, and the type of restoration chosen. Single implants are generally less expensive than full-arch solutions, and the overall investment reflects the materials and time involved in both the surgical and restorative phases. During your consultation at Innova Dental, you will receive a detailed treatment plan with transparent pricing.
Can I get an implant if I have gum disease?
Active gum disease must be treated before implant placement, as infection and bone loss can compromise the success of the implant. However, once your gum health is restored through professional cleaning and improved home care, you may be a suitable candidate. Your dentist will assess your periodontal health and work with you to achieve the best conditions for implant success.
This article is for informational purposes only and does not constitute dental or medical advice. For personalised guidance, consult a qualified dental professional.